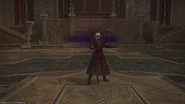
The Battle of Castrum Lacus Litore is a large-scale critical engagement available in Final Fantasy XIV: Shadowbringers as part of the
Story[]
At long last, the enemy stronghold is but a stone's throw away. With your Resistance comrades at your side, all that remains is the final assault.
Critical Engagement Description
Lacus Litore is an imperial castrum held by the IVth Imperial Legion as the seat of their dominion over Bozja. It was originally known as Alermuc Fortress and was built in the hope of deterring the Garleans during their initial conquering of Ilsabard. The fortress's location above a massive hill was chosen for its natural defenses, surrounded by all sides by steep cliffs. Unfortunately the Garleans airships were able to surpass these defenses and take the fortress. Following Bozja's capture and annexation, it was given a new Garlean name.
During the events of the Bozjan Southern Front, the Bozjan Resistance raids the fortress in an attempt to overtake the IVth legions main base of operations. The soldiers storm the front gate with Tunnel Armor, rescue captured soldiers, and kill the centurion commander Sadr rem Albeleo in battle. Within the Majesty's Palace, the resistance confronts Lyon and his beast Dawon who retreat after being defeated.
Before the Bozjans can revel in victory, the double-agent Misija appears and summons a primal, tempering the present members of Gunnhildr's Blades and retaking the fortress for the legion. After Misija is taken into Resistance custody, the IVth legion retreats to Zadnor, and the castrum is taken by Bozjan forces once more.
Objectives[]
- Protect the tunnel armor.
- Storm Castrum Lacus Litore.
- Find a way to open the barricade.
- Free Prisoners.
- Clear the airship landing.
- Clear Majesty's Auspice.
- Defeat Dawon.
- Challenge Lyon at Majesty's Place.
Progression[]
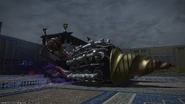
The raid will need to divide into two groups, one to climb to the top of the Grand Gates, and another to continue into Eaglesight. The bosses in these areas must be pulled together or the raid will wipe by a giant magitek colossus.
Eaglesight[]
- Chain Cannon - The Helldiver will fire bullets from its arm cannon. The AoE persists for a few seconds after the cast, causing damage every couple seconds and adding a stab wound debuff.
- MRV Missile - Raid Wide Damage.
- Command: Lateral Dive - Five other Helldivers will surround the Tunnel Armor, players must stand in the blue flashing AoE's to protect the Tunnel Armor from damage.
- Command: Suppressive Formation - Helldivers will appear on the sides of the arena and dash in with AoE's.
- Magitek Missiles - Hard hitting tank buster on the tank.
- Command: Infrared Blast - Four helldivers will appear on each side of the arena and tether to the tunnel armor. These tethers will deal Fire Resistance Down to the target. Players must take turns taking the tether from the helldivers, and will take near-fatal damage without heavy mitigation or
- Command: Dive Formation - Three sets of Helldivers will appear one after the other similar to lateral dive.
- Command: Chain Cannon - Helldivers will arrive around the arena targeting players with chain cannons.
If Brionac is still alive when the 4th Legion Helldiver is defeated, the players that fought the Helldiver will be swarmed by 4th Legion Sky Armors until Brionac is defeated. If the players fighting Brionac don't defeat it within 3 minutes, a 4th Legion Magitek Colossus will spawn and begin instantly killing players one by one. Once all of the players are dead, it will turn its attention to the Tunnel Armor and destroy it, failing the engagement. This enrage will also happen if the armor is destroyed by enemy attacks or if either the Brionac or Helldiver parties wipe entirely.
The Grand Gates[]
- Electric Anvil - Tankbuster on the primary threat target.
- False Thunder - Brionac lowers one of its arms over the platform and sweeps it across, leaving the area behind the arm safe.
- Lightning Shower - Party-wide damage.
- Energy Generation - Spawns two to four energy orbs. Purple orbs cause a circle AoE, while white orbs cause a ring AoE. Later in the fight, the orbs will tether to each other and swap places, or will magnetic tether to players to push or pull them.
- Voltstream - A series of rectangular AoEs.
- Anti-warmachina Weaponry - Brionac will expose its Magitek Core, which becomes a separate target. While the core is exposed, Brionac will constantly damage the Tunnel Armor with an unavoidable lightning attack. Destroying the core stops the attack, but while focused on the Tunnel Armor, Brionac will not perform any of its other attacks against the players fighting it.
If the 4th Legion Helldiver is still alive when Brionac is defeated, the players that fought Brionac will be swarmed by 4th Legion Sky Armors until the Helldiver is defeated. If the players fighting the Helldiver don't defeat it within 3 minutes, a 4th Legion Magitek Colossus will spawn and begin instantly killing players one by one.
After the defeat of both the Helldiver and Brionac, the Tunnel Armor will breach the gates, allowing players through. After breaching into Bladesmeet, players will be able to find a loot chest which will drop Bozjan coins, and may rarely drop a Battle With an Esper (Zodiac Age Version) Orchestrion Roll, Bozjan Runner's Secrets materials, or a Magitek Helldiver F1 minion.
Bladesmeet[]
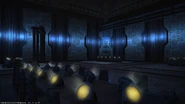
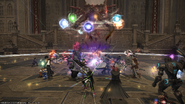
The raid will confront Albeleo and a contingent of soldiers, beasts and magitek devices. Albeleo will summon adds that tether and make him invincible, these must be killed as fast as possible. When Albeleo's health nears zero, he will retreat behind a barricade, leaving players to deal with his remaining forces.
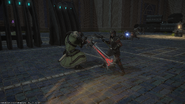
After Albeleo flees and the forces are dealt with, players will be tasked with removing the barricade, requiring them to explore the six adjacent halls. The upper halls each have three 4th Legion Duplicarii, while the lower halls have a single 4th Legion Hexadrone that must be defeated, after which the three doors in their respective hall will be made accessible. One door will contain another miniboss that must be defeated and a switch that requires a player to stand on it afterwards, another will be empty, while the third will have a 4th Legion Executioner in the process of executing a prisoner. What each room contains is randomized each run. The prisoner can be saved if the executioner is defeated quickly, however the prisoners cannot be healed by Healers or healing Lost Actions. The executioners will begin executing prisoners as soon as players can explore the halls. All of the enemies in the side halls are vulnerable to instant death from Lost Death or Lost Assassinate, including the executioners.
Minibosses that can be encountered:
- 4th Legion Prometheus
- 4th Legion Colossus Rubricatus
- 4th Legion Beastmaster and Tamed Panther
- 4th Legion Beastmaster and Tamed Garm
- 4th Legion Aquilifer and Learned Familiar
- Imperial Pyromancer and Blazing Familiar
Once all the minibosses are defeated, each of the 6 switches must activated by having a player walk over it, deactivating the barrier. Back in the main hall, a 4th Legion Scorpion will appear and block the way. The NPC Marsak will hold enmity for this add, allowing players to focus on defeating it.
Airship Landing[]
At the Airship Landing, Albeleo will transform into Adrammelech, before becoming targetable.
- Holy IV - Raidwide damage, first use places a damage barrier on the edges of the arena.
- Flare - Tankbuster
- Curse of the Fiend - Summons an orb in the center, plus elemental orbs. Accursed Becoming will cause the elemental orbs to travel into the central orb, resulting in specific mechanics that need to be performed by players, or be dealt damage. Adrammelech will only use 3 of 6 elements in each encounter, one of which will always be Water, another of which will be Fire or Ice, while the last will be either Earth, Wind or Lightning. Later uses of this mechanic will have pairs of orbs hitting the central orb, forcing players to perform mechanics one after the other, following the priority of Water, Ice/Fire and Earth/Wind/Lightning.
- Water - Raidwide knockback from the center.
- Ice - Unavoidable damage and inflicts the Deep Freeze debuff on players unless they are moving.
- Fire - Unavoidable damage and inflicts the Pyretic debuff on all players. Pyretic will deal damage on players if they are moving, using weaponskills, magic or abilities, or auto-attacking.
- Earth - Casts a cascading AoE from the center of the arena.
- Wind - Casts a giant donut AoE around the very edge of the arena. Inflicts Windburn.
- Lightning - Casts a giant point-blank AoE from the center of the arena. Inflicts Paralysis.
- Tornado - summons small tornados that circle around the room, dealing damage and tossing players into the air.
- Burst II - Several small circle AoEs spiral out from the center of the arena toward an edge, leaving behind lightning orbs. Adrammelech will tether the orbs in sequence to each other, starting with the central-most orb and ending with the orb furthest from the center. These tethers resolve as line AoEs between the orbs, the orbs exploding into small circle AoEs, and the final orb exploding into a massive circle AoE. Getting hit by any part of the attack inflicts Paralysis.
- Meteor - summons arcane sphere adds around the arena that will gradually call down meteors that deal raidwide damage. The spheres should be destroyed to prevent multiple hits of raidwide damage.
After defeating Adrammelech, players can proceed forward and find another silver loot chest. Up to six extra bronze chests can appear here depending on the amount of prisoners saved in Bladesmeet. The silver chest contains Bozjan coins, and potentially field notes for Albeleo. The extra bronze chests also contain Bozjan coins, and rare lost fragments.
Head up the stairs to enter Majesty's Auspice.
Majesty's Auspice[]
The final encounter of Castrum Lacus Litore is against the bird-beast Dawon and its master, Lyon rem Heslos, with Dawon being the main encounter.
- Scratch - Tankbuster
- Molten Plumage - Deals raidwide damage and summons multiple plumes across the arena. Fire plumes cast point blank AoEs, while wind plumes cast donut AoEs. Subsequent casts of Molten Plumage will also summon four Zus that will push back the plumes in each quadrant of the arena to another.
- Pentagust - 5 thin conal AoEs in front of the boss, targeted at a random player.
- Frigid Pulse - Large donut AoE.
- Fervid Pulse - Large cross AoE based on Dawon's orientation firing out from its front, back and flanks.
- Swooping Frenzy - Large AoE where Dawon leaps to the targeted area.
- Obey - A special mechanic combing the previous 3 attacks. Markers will appear on the arena that Dawon will use Swooping Frenzy to leap to and immediately utlise either Frigid or Fervid Pulse depending on the shape present on the marker (circle or plus). The first use of this mechanic will have three markers, while subsequent uses will have four. Markers will indicate which order they will be leapt to.
Majesty's Place[]
After the second use of Molten Plumage by Dawon, Lyon will challenge the raid, allowing up to 8 players to utilise a teleport to reach him in Majesty's Place. During this phase, Dawon will utilize random mechanics and be accompanied by multiple adds, some which will tether and make it invincible, that will keep spawning until Lyon wins or is defeated. If Lyons defeats the challengers or if all of his mechanics execute without falling beneath 50% health, Dawon and the beasts will gain a buff that empowers them, giving them greatly increased damage and defense, and will wipe the raid. If the challengers win by pushing Lyon below 50% health, this buff will be applied to the players.
- Raging Winds - Raidwide damage, puts a damage barrier on the edge of the arena.
- Wind's Peak - Small point-blank AoE followed by a raidwide knockback. Dodge the AoE before heading in to be pushed back safely.
- Taste of Blood - Lyon will leap to an edge of the arena before casting a 180-degree room-wide AoE. Rush behind him to dodge.
- Twin Agonies - High damage tankbuster
- King's Notice - Gaze attack, inflicts Hysteria on those players looking at him when cast ends.
- Heart of Nature - A combination of mechanics that has three variations. Players have until the third variant before Lyon enrages.
- Variant 1 - Cascading earth AoE followed by Taste of Blood.
- Variant 2 - Four small travelling earth AoEs originating at the intercardinal points of the arena, followed by Wind's Peak and Twin Agonies.
- Variant 3 - Four small travelling earth AoEs originating at the intercardinal points of the arena, followed by King's Notice and Taste of Blood.
The duty is cleared with the death of Dawon. A gold chest will appear before the exit that contains 50 Bozjan coins and, rarely, field notes for Lyon.
Musical themes[]
"Into the Fortress (Zodiac Age Version)" plays throughout most of the duty. "Battle with an Esper (Zodiac Age Version)" plays during the battles with the 4th Legion Helldiver, Brionac, and Adrammelech. "Life and Death (Zodiac Age Version)" plays during the battle with Dawon and Lyon the Beast King.
Rewards[]
First time completion of Castrum Lacus Litore will allow players to purchase item level 495 gear from the Resistance Supplier in the Southern Front in exchange for Bozjan Coins. Bozjan Coins are earned from chests in Castrum Lacus Litore and, after completing ![]() The Lady of Blades, from skirmishes and critical engagements.
The Lady of Blades, from skirmishes and critical engagements.
Chests in the duty also have a chance of dropping field records and special items that can be traded in with the previously mentioned gear to augment them with the Save the Queen effect, granting a stat bonus that only applies in Save the Queen instances.
Maps[]
Gallery[]
Behind the scenes[]
Lacus Litore is Latin for "Lake shore".
Before patch 5.35, the original name of the stronghold was Alamut Fortress, in reference to the real world Alamut Castle that existed in Iran. This was changed for unknown reasons to Alermuc Fortress.
Alamut, and now Alermuc as an old Bozjan word, means "eagle's nest", which is referenced in various dialogue in the story.
Prior to patch 5.57, the switches in Castrum Lacus Litore required players to remain standing on them untill all were activated. This was changed to allow groups of less than 6 players the chance to proceed with the raid.


